
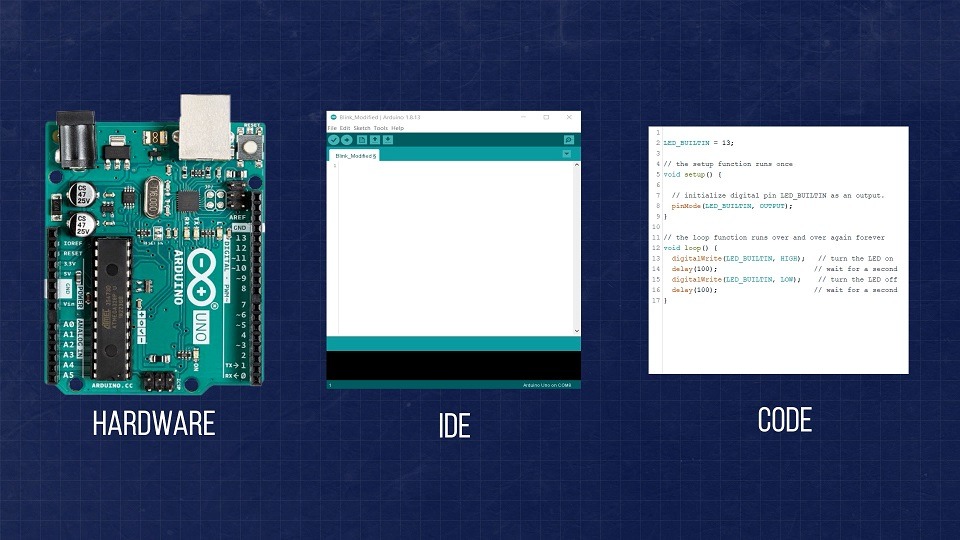
The Arduino Platform
Hardware – The Development Board,
Software – The Integrated Development Environment or IDE,
and code – The Arduino Core, which are pre-built “C” functions that simplify using the many features or peripherals found on the embedded microcontroller.
At the heart of every Arduino board is a microcontroller. You can think of a microcontroller as a small computer that takes in Inputs, applies some logic, and provides an output.
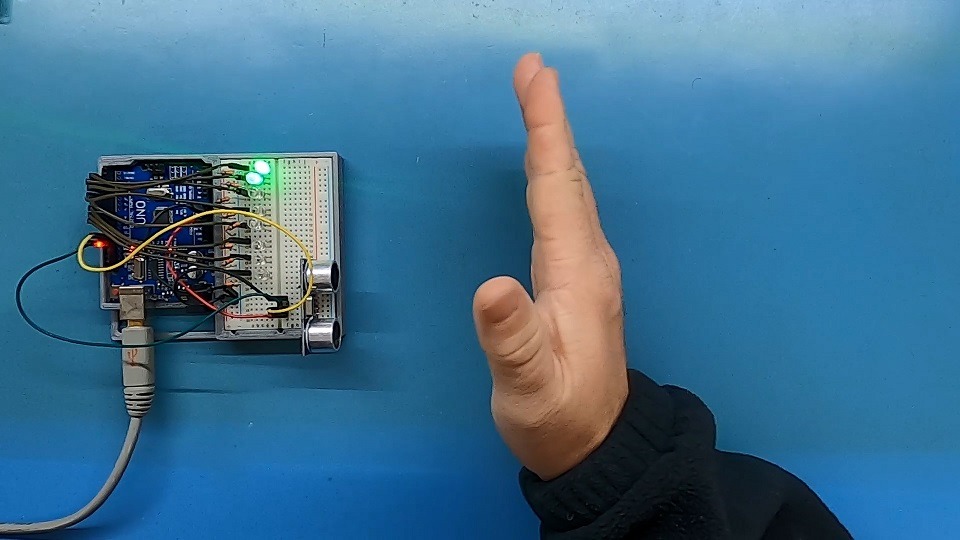
Ultrasonic Example
As an example, say you want to design a device that indicates how far away an object is. Well, we can measure the distance with an ultrasonic sensor and provide that information as an input to an Arduino board. Then we program the Arduino to determine what to do at specific measurements. Finally, the Arduino can turn on LEDs to indicate how close or far the object is. The key take away is that the embedded microcontroller is particularly good at handling inputs, applying logic, and providing outputs.
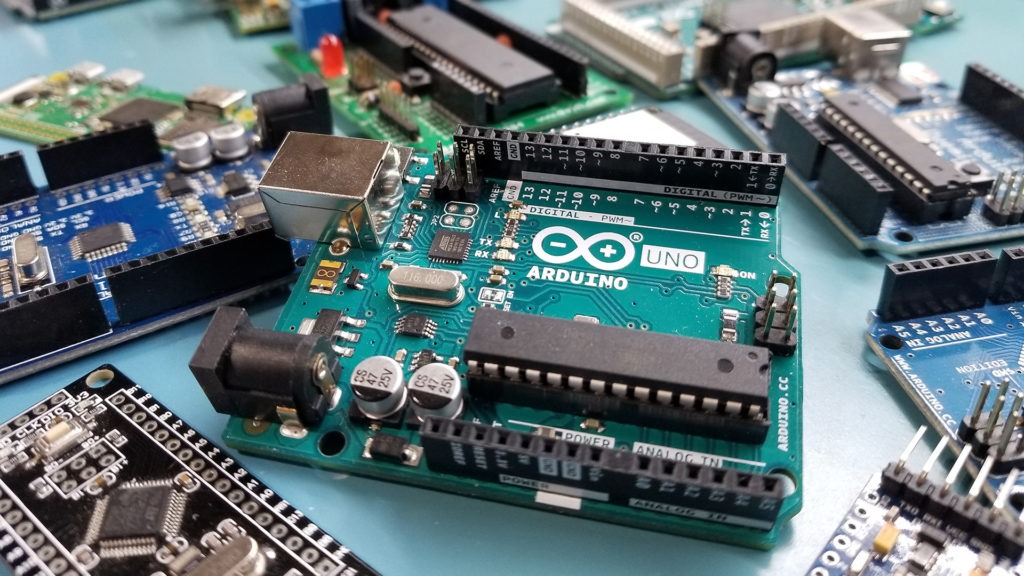
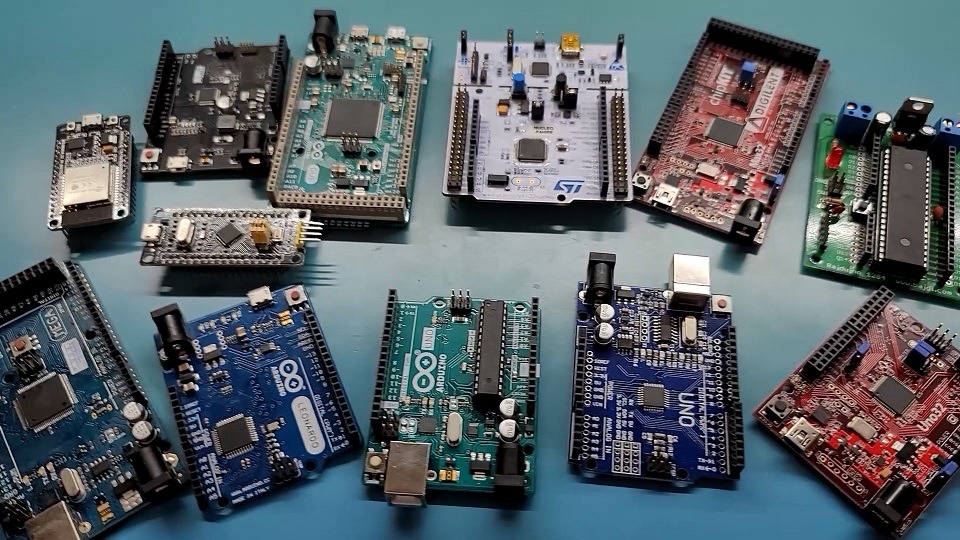
Honestly, this could be the most overwhelming part in the beginning. The company that designs and manufactures Arduino boards have a lot, let me repeat that, a lot of different boards to choose from.
Beyond the officially branded Arduino boards there are even more Arduino compatible boards available on the market. On the plus side this gives us the “Maker” a lot of choices in finding what will meet our project needs.
The great news is – it doesn’t really matter which board you start with. The power and usefulness of Arduino is that the same “development environment” and “code” will work pretty much the same on any of the development boards.
So if you start your project with the Arduino Uno and find later that your project needs more flash memory or a faster processor, most if not all of the code you have written for the Uno will work on any of the other Arduino or compatible boards.
In this series we will start with the Arduino Uno, as it provides a lot of functionality and demonstrates what the Arduino Platform can do. You will see me use both Officially branded Arduino boards and unofficial Arduino compatible boards through-out this series.
Arduino Uno
We will also be using a number of supporting electronic components such as jumper wires, breadboards, resistors, capacitors, etc. What makes the Arduino board special is it includes most of the hardware we need for getting started – already built right in. The microcontroller embedded on the Arduino Uno is the 8-bit AVR based Atmega 328P running at a blazing fast 16 MHz. There is a built-in programming and communication interface, where you can supply USB power and program the board. There is a 7–12-volt DC power input jack with voltage regulation to ensure the correct voltage is supplied to the microcontroller. The board includes breakout pin headers which allow for easy access to the I/O pins. There is the In-Circuit Programming Header for when you do want to use an external programmer, which will cover later in this series. Finally, there is a convenient reset button and indicator lights that can give us some indications of what is happening on the board. Having all these features integrated onto a single board makes getting started much easier and faster. If we did not have a board like this, we would need to prototype out all these features on a breadboard which results in a much less user-friendly configuration.
Arduino IDE
Now for software, there are quite a few options for writing code and programming the board. Some people find a simple text editor and command line interface is sufficient to meet their needs, while others might want the bells and whistles a full fledge IDE such as Microchip Studio. The most common option and somewhere in the middle of the two is the Arduino IDE. This is a Java based application that is tailored made to support programming and uploading code to the many Arduino and Compatible boards. The Arduino IDE is open source and free to download via the Arduino website.
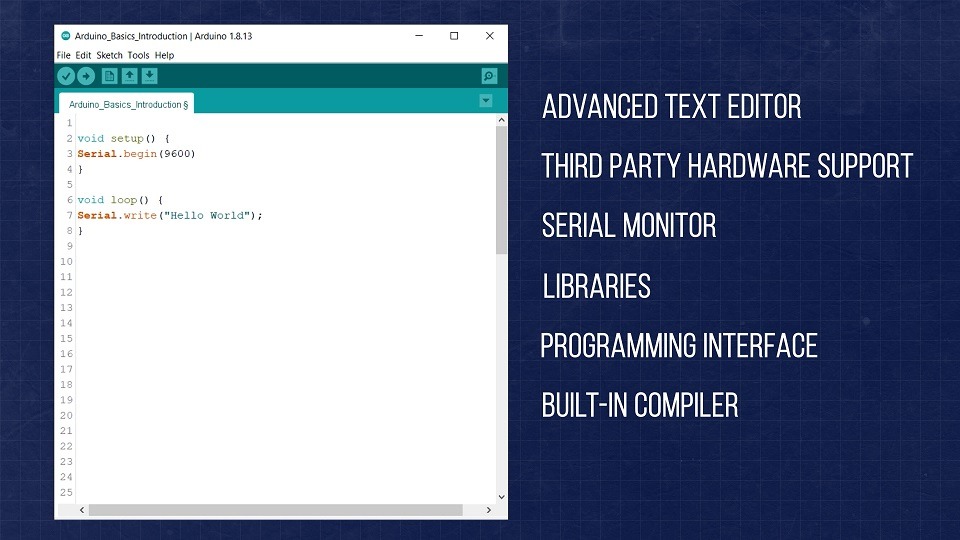
To download, visit www.Arduino.cc and select SOFTWARE from the main navigation menu. Next select the download option which opens the Downloads page. Here you can select the latest version of software that is compatible with your computer.
After clicking on the download link there is usually a page asking you to support the project. Here you can either Contribute and Download or Just Download the software. Once you have the installation file downloaded, you can install and run the application. To me the Arduino IDE strikes a good balance of features allowing me to do everything I need, without being overwhelmed with so many features it is hard to know what to do next.
Programming
Now that we have the IDE installed, let’s talk a little more about the Arduino Framework. This is what really sets the Arduino Platform apart from many other microcontroller development boards. By using simple functions, we gain access to and can manipulate the peripherals found in the embedded microcontroller. Without the layer of abstraction that the Arduino Framework provides, we would have to dig through data sheets to find what internal registers where responsible for controlling the feature we want and then use bitwise manipulation to configure the microcontroller for use.
We can use a simple programming function like “digitalWrite, where we can identify the pin we want to control and whether it is high or low. And because this programming function is agnostic of the hardware it is running on, this same function works on all the boards previously mentioned. To better illustrate how much simpler the Arduino Core makes programming for us, here is some example code for writing a string to the Serial Interface or UART. On the left you see what it takes to configure and use the Atmega 328P microcontroller with no abstraction layer and on the right is the code utilizing the Arduino Core on the same Atmega 328P chip.
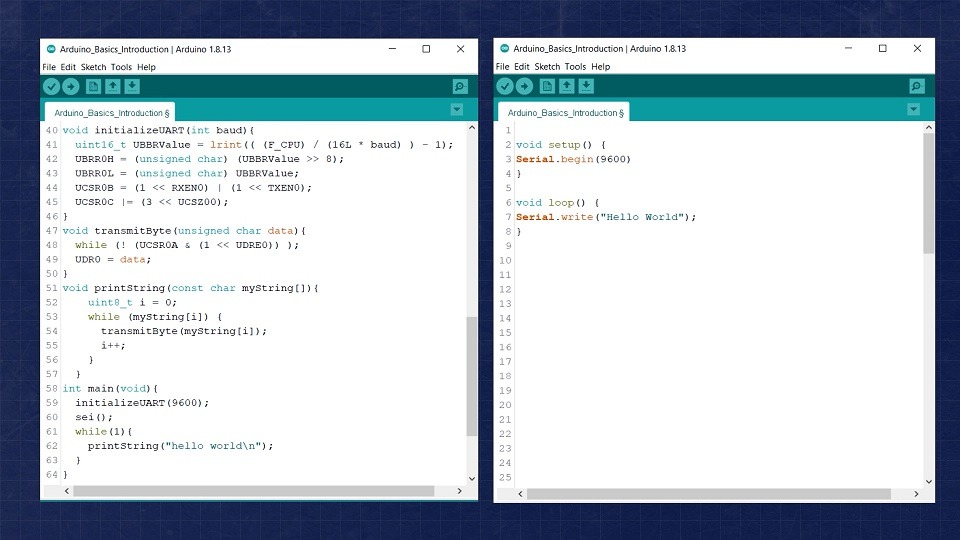
Even without knowing what all the code represents, you can see that the Arduino Core is doing a lot of the nitty gritty stuff for us behind the scenes, so we can focus on our project and not what register needs to be manipulated.
In some cases, this layer of abstraction comes at a performance cost, and not all features of the microcontroller are made available via the framework. However, later we can learn to overcome these issues.

